Showing posts with label patterns. Show all posts

Tuesday, October 17, 2006

Red scarf at night....

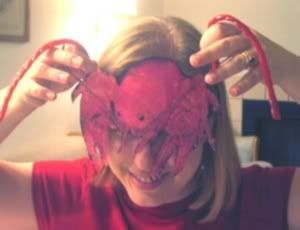
Finally finished up my first red scarf. No pictures draped luxuriously across pretty foliage - you'll have to make due with one of my ever patient Dan, who laughed at me the whole time I was trying to take this picture. "Should I try to look saay-a-xy? Does this make my butt look big?" Sigh.

Thought I'd share the pattern I came up with (though honestly, it's barely a pattern at all, more of an anti-pattern, really):


Take it Easy Scarf

Yarn: I used Patons Classic Wool in Bright Red, 1 1/2 skeins
Needles: I used US size 8s
Finished Size: My scarf ended up a little over 60 inches in length and about 6 1/2 inches wide

Cast on 30 stitches (add or subtract groups of 6 stitches to make it wider or narrower)

First row: (K3, P3), repeat to the end of the row.

Repeat this row until you're bored, until the next commercial, until you hear "stop looking at me!" from your little ones, or until you think it's time to do something different. Then, move on to the second row.

Second row: (P3, K3), repeat to the end of the row.

Repeat this row as long as you like. Then switch again. Keep alternating these two rows however you like until the scarf is as long as you want it. Cast off however you like. Fringe, or don't. It's all good.

Thursday, July 21, 2005

Seven hundred and four*

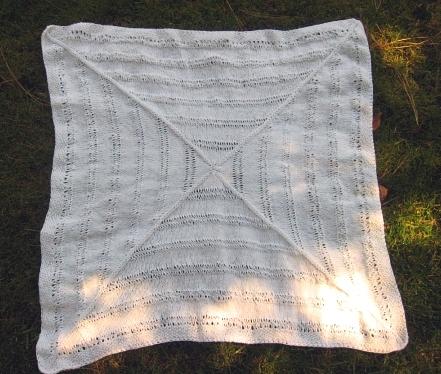
* Number of stitches to bind off around the edge of the baby blanket I just finished. This after 9 rows of seed stitch that were almost as long. Solid proof that I am either insane or truly lousy at math. But in the end, it came out well and is off to wrap around a yet to be born little one, so my job is done. Sorry for the lousy picture - I'm learning that white yarn is hard to photograph well. Tried it in full sun, but all you could see was an odd, glowing white spot. Then I tried inside, but it looked flat and boring. Went outside into the shade, but the ground was soaking wet from the thunderstorm we had last night, so I had to balance it carefully on the grass and couldn't smooth things out. You can see the basic shape, which is enough for me.

I promised basic instructions, so here they are. It's a really easy blanket that can be made from any yarn you like - just adjust needle size accordingly:

double pointed needles, size 6
29 inch (or even larger) circular needle, size 6
Dk weight yarn of some sort
Twisted drop stitch: knit, wrapping yarn around both needles then around right needle before pulling yarn through.

Using a provisional cast on and waste yarn, CO 2 stitches. Knit 4 rows in stockingette stitch. Pick up 2 stitches from each side and original cast on side.
Row 1: *k1, yo, k2, yo, k1, place marker* repeat around.
Row 2: *k1, yo, k3, yo, k1* around.
Row 3: *k1, yo, k4, yo, k1* around.
Rows 4-9: Continue adding two yarn overs at each corner with each row.
Row 10: *k1, yo, twisted drop stitch across all knitted stitches, yo, k1* around.
Row 11: *k1, yo, k across all drop stitches, yo, k1* around.
Row 12: *k1, yo, twisted drop stitch across all knitted stitches, yo, k1* around
Transfer to circular needle when it starts getting larger.
Repeat these 12 rows until you are close to the finished size you want, then do 9 rows of seed stitch after the last set of drop stitch rows. Bind off loosely, and you're done.