Soap making
In an effort to start paring down things that need to be moved, I made soap last night. We're running a bit low on our regular antimicrobial/nice to the skin shower type bar, so I made some more up. Here's how I do it: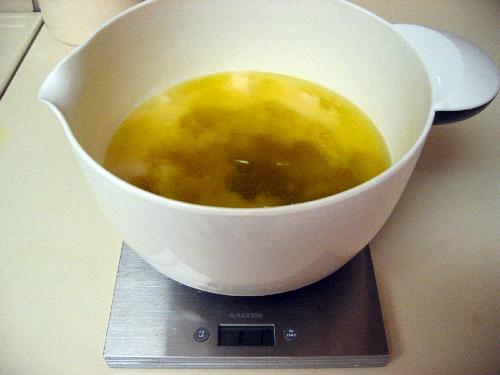 First, I measure out all the oils and fats needed. For this batch, that meant olive oil, coconut oil, palm oil, castor oil, and shea butter. The amounts of each are important, so I use my kitchen scale to weigh everything out. I give the oils and fats a bit of a whir with my stick blender to break up any large pieces about now.
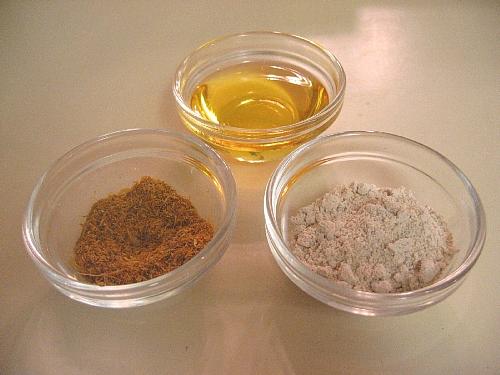 Next I measure out the "extra stuff" - things that add scent, help soothe skin, or just make the soap look more interesting. From left to right are powdered chickweed (soothing and healing), tea tree and oregano essential oils (antimicrobial), and powdered oatmeal (soothing). The first and last will also give the soap a nice flecked appearance since there isn't anything that will color it otherwise.
 Next, I need a mold. I have a custom wooden mold that Dan made up for me a while back, but you don't have to use anything that fancy. For instance, pictured on the left is a mold I often use if I want to make a few quick square bars. Can anyone guess what it is?
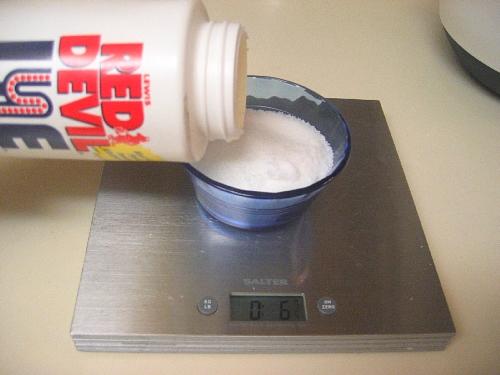 Next I measure out the lye. This is very, very important. Different oils and fats need different amounts of lye to cause the chemical reaction needed to form soap, so I use a lye calculator (there are many of these available online) to do the math for me and measure carefully. Yes, you do need lye to make soap. No, there isn't any lye remaining in the soap when you use it. Yes, you should be very careful when using lye. Wear protective clothing (including eye protection), gloves, and shoes that cover your feet.
 Next, I measure out the water. Then I slowly pour the lye into the water (never pour water into lye!) and stir until the lye dissolves. The lye solution heats up pretty quickly. There are some fumes that aren't good to breathe about now, so I make sure there's lots of ventillation. The measuring cup is in the sink in case of spills.
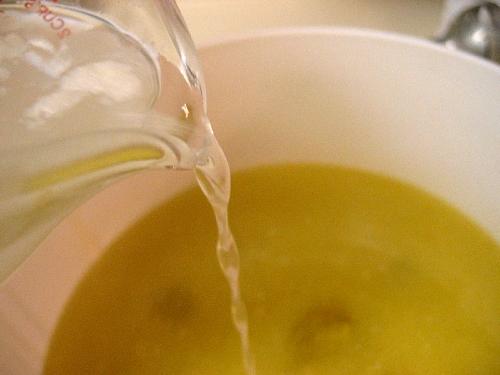 Now the lye solution gets poured into the oils and fats. The heat of the lye and water help to melt any fats that aren't liquid yet and also starts saponification (the process of turning fats and oils into soap). Heat and motion both speed the process along, so I start in with the stick blender to get things going.
 I blend until I see trace, meaning when I pick up the blender (or a spoon), the mixture is thick enough to show a trace of the drops or drizzle on top for a moment or two. Pictured at left is a rather thick trace - I really wanted to get a good picture and went longer than I had planned. This makes it harder to mix in essential oils and the like, and can make getting it into a mold more difficult as well. I quickly add in the essential oils and other goodies.
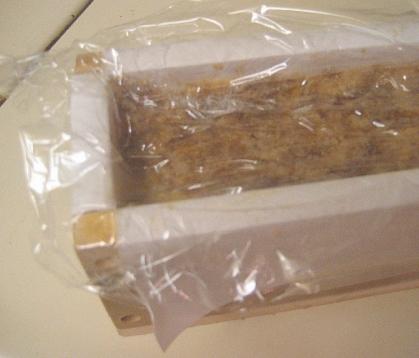 Into the mold it goes. The mixture was thicker than usual this time, so I had to work quickly. I cover the top in plastic wrap to cut down on exposure to the air while saponification is happening. Otherwise, you can end up with an ashy layer on the top of the soap. Nothing harmful, just unattractive. I pop the mold into the oven preset to 170 degrees, then let it sit and warm for an hour. This helps speed things along. Then the mold is left in the oven (turned off) overnight. In the morning I do a quick test - rub my finger along the top and touch my tongue to see if I feel any "zap". None at all, so we have soap!
 I cut the long bar into one inch sections and voila. The soap will be harder and lather better if left to dry and cure for a little while longer, but I can't resist using some of the ends to give my hands a quick wash. There really is nothing like real, honest soap - it's so unlike the detergent bars that you find in the supermarket (yes, even Dove isn't as gentle or good to your skin as real soap made with lye). Truly lovely stuff.
![]()


|